
This helmet was made for a student film (which I still haven't seen) directed by Miguel Rey Garcia. Costume design by Scott Ngo. Miguel commissioned me to make the hero helmet as the one he had made by the same people who made the costume wasn't quite up to scratch.
The helmet needed to be light, thin and strong so an obvious choice was fibreglass. As I wanted to improve my sculpting abilities I decided to sculpt the helmet out of clay. The stunt man wasn't available to have his head cast so I made an armature to support the sculpt out of thick armature wire covered with ModRoc, which was then coated in shellac to stop the plaster leeching moisture from the clay.
I then blocked out the base form of the helmet and slowly refined it, while communicating with Miguel to ensure he was happy that I was sticking to the design.


Viewing the sculpt from all angles is important so that the symmetry remains intact - sculpting such a geometric form from such a soft material is pretty unusual, and is a very tricky thing to do. It's easier to keep a model symmetrical using a hard material like chemiwood, but I'm aiming towards a career in sculpture, so I needed to challenge myself as much as possible.

This was the result after a couple of weeks sculpting, trying to make everything perfectly symmetrical, with all details added. I had decided to carve the horns and tusks out of chemiwood and attach them after casting - I was doing a fibreglass mould and cast so I could have no undercuts and didn't want to make the mould overly complex.


There are still problems with the symmetry but they were only noticeable if one looked specifically for the problems. This project taught me a huge deal about sculpting geometric forms, and I'm sure if I did this project again my sculpt would be a vast improvement on this one.


I had decided to make the mould in three parts, two frontal pieces and one rear piece so I walled up one of the front halves with some fresh clay. Getting the clay along the ridge was tricky, I had to be careful not to damage any of the sharp lines of detail.

This is the other side of that wall - supports every so often to help hold the wall up, all just tacked to the surface of the sculpt. If you use fresh clay for the wall it shouldn't stick to the sculpt which will probably be getting slightly leathery by the time you come to moulding.

The clay needs to be sealed with a varnish of some kind - the most typical is shellac because it has such a quick drying time and doesn't leave any kind of residue on the inside of the mould. I was using some regular wood varnish I'd picked up in a general hardware store which had a very nice smooth finish to it, thus smoothing out the surface of my sculpt that little bit extra.

Seconds after applying the resin gelcoat it started to eat the varnish. This was not good news. It seemed I had used a varnish that did not get along with polyester resin.

The texture created was fascinating, something like lizard skin and something I will most certainly have to experiment with at some other point in time. However, I had to deal with the task at hand and somehow remove the gelcoat without disturbing the surface of the sculpt too much..

I tried to scrape away the gelcoat on the wall of the mould but it just made a big mess.

So I waited until the gelcoat had started to set and simply peeled it off.

Once it was all off I breathed a sigh of relief - if for some reason I had had to re-sculpt detail I would have been in grave danger of missing the deadline, which wasn't an option. Filming had already been arranged for certain days and couldn't be changed. That'll teach me for trying to get away with the cheap-o stuff when it comes to dealing with fibreglass. Working with fibreglass is an alchemy - if the room you're working in is too humid, or too cold, or there's some trace element of a chemical fibreglass doesn't like (or a whole bunch of it smeared all over your sculpt), it'll give you problems. Stick with what you know works and nobody gets hurt. But even then, no guarantees.

After using shellac to seal the sculpt I continued on with the fibreglassing. A layer of gelcoat goes on first to pick up all the detail, then a layer of fibreglass tissue, two layers of fibreglass matting before finally another tissue layer to make sure there are no horrible spiky bits on the outside of the mould which would cut up your hands. While the fibreglass is still green I also trim around the walls to take off any spiky bits there, too.

Once the fibreglass has set remove the clay wall, build the next and continue on. Be sure to apply some release agent between sections of the fibreglass mould or it'll just all stick together.

Once all the sections are complete drill holes through the walls between the sections so you'll be able to bolt them back together

Then rip apart the entire thing and remove all the clay.

I decided to cast the front and back as separate pieces as access to the inside of the mould while casting would be more than a little tricky. More release agent was applied onto the mould - I used PVA release agent and mould wax, before a layer of gelcoat went on to capture all the detail the mould managed to pick up. Then a layer of tissue, two of matting and a final layer of tissue to soften the inside (this was going to be on somebodies face).

When taking casts from a fibreglass mould one can be quite brutal - the fibreglass can take it. If it can't, your mould/cast wasn't strong enough anyway. This cast came out pretty nicely but needed some fixing up with car body filler.


The eye holes were then cut out with my multi-tool and edges were sanded down.

The horns were carved from chemiwood and attached onto the helmet, then sanded down to shape.

The little horn on the front was sculpted in clay, moulded in silicone and cast in fibreglass resin, then attached with car body filler. Everything was sanded down to be nice and smooth.

Everything was filler primed yellow.

Spot fixes were made and the tusks were added. Everything got another coat of filler primer.

The helmet was then hand painted with acrylics with a very soft brush. To improve the finish I would have sprayed the final colours but the deadline was coming up and I was out of time. The brush marks weren't visible on camera, so it only made a difference from a personal point of view.

The eyes were vacuum formed around plugs I had made to fit into the eye sockets, then given a wash on the inside with yellow ink. These were then glued into place and a layer of mesh was stretched over the inside of the sockets to hide the actor's eyes.

The front and back of the helmet were fixed together with a strip of fabric which could hinge open, allowing the actor to get in and out as the neck hole was too small to fit through. The helmet was then held shut with strips of velcro on the sides, though pairs of neodymium magnets would have been quicker to fix together.

I did not make but was asked to repaint the armour the two main characters would be wearing as the colours were off. I gave everything a base coat of Isoflex roofing primer, a fantastically toxic chemical. Isoflex primer dries crystal clear, flexible and smooth, so can be used to finish an object, but in this case I was using it as a base onto which to paint - acrylic paint sticks to Isoflex like nothing else so this made sure the armour wouldn't flake paint.

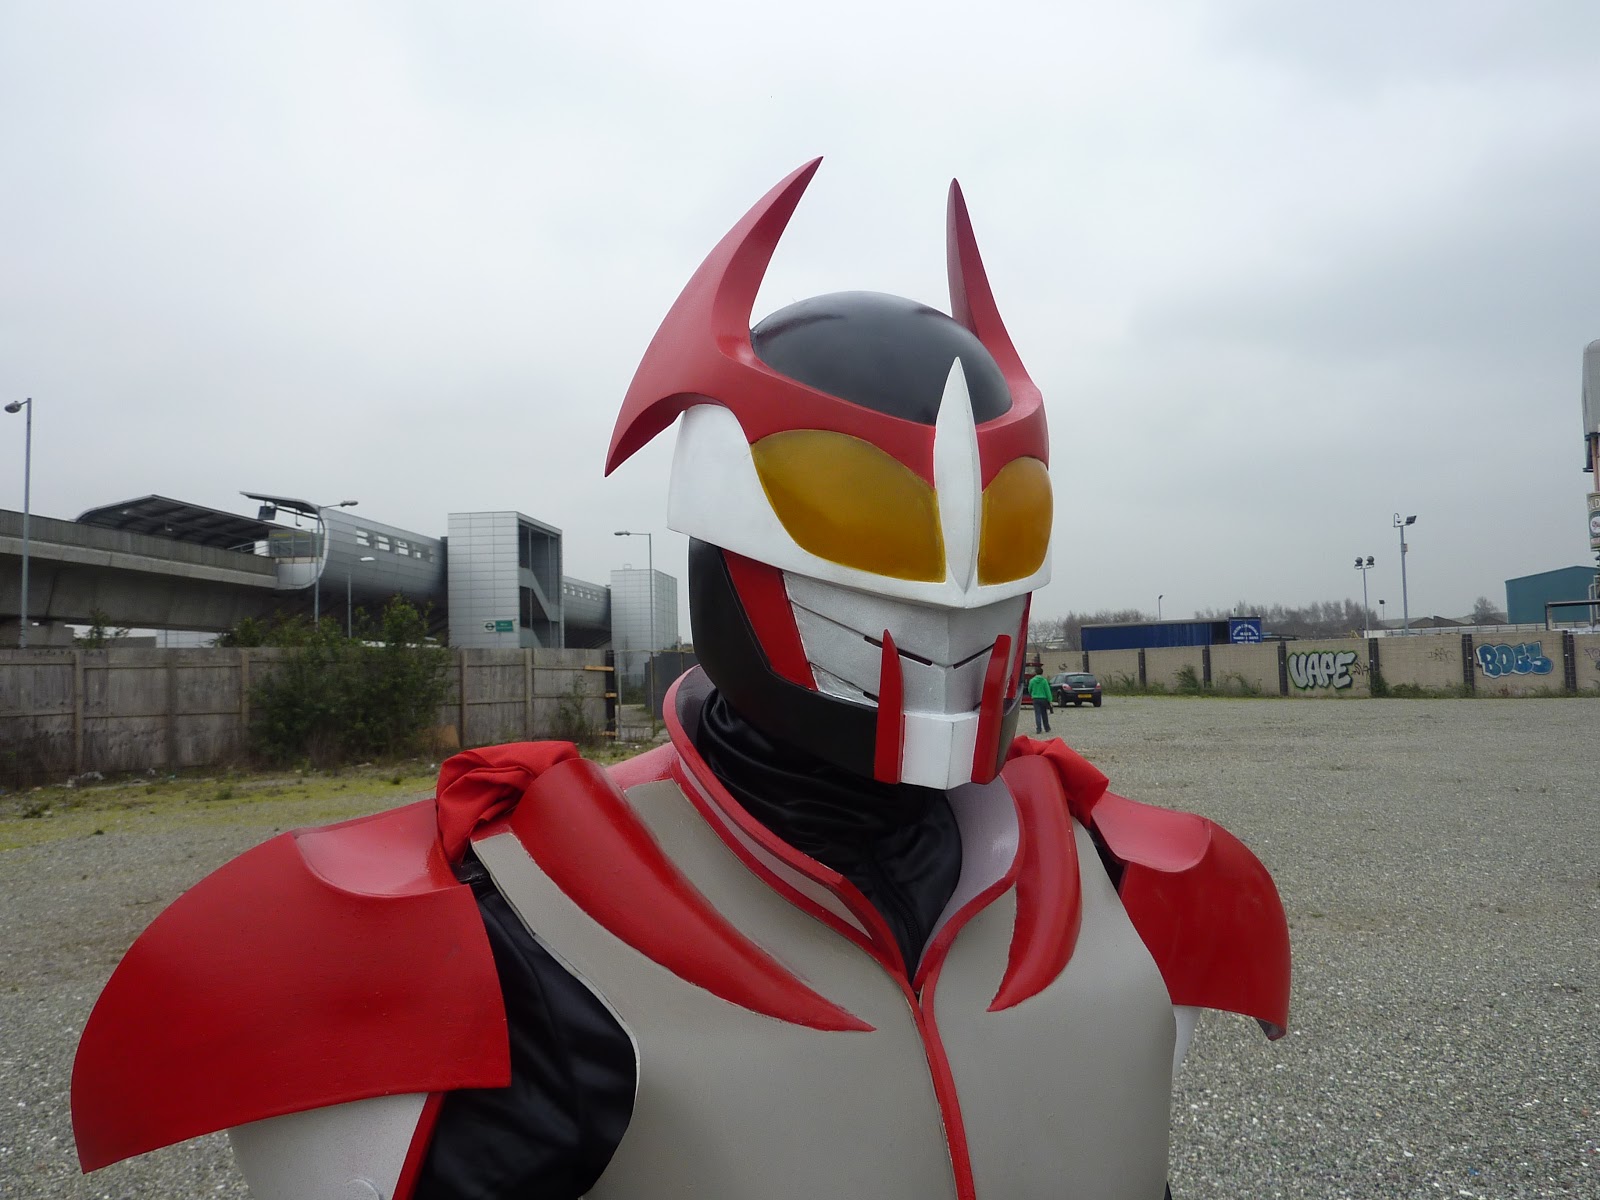
And here is the full hero costume:


1 comments:
This looks great. I like how you put in your almost mistake. Shows how nothing goes as planned but through a little patience and hard work you persevered. Good job!!!
Post a Comment