These are Figurines I made of Lewis and Simon of the Yogscast's alter egos, Xephos and Honeydew. Just a fun little project I decided to do to work on my small scale sculpting, moulding and casting skills, which have been getting rustier and rustier since uni. I did these to develop my cartoony style, something I was toying with a while back.

I started off sculpting the heads and the bodies of the figurines in plasteline separately, as moulding and casting a whole model would be overly complicated.

I polished these up as best as I could and carved some details such as Lewis' sword and gun out of some small pieces of chemiwood. I actually spent too long polishing them up, as the plasteline I had was quite soft and didn't polish easily. I should have kept them quite rough, and finished them up once they were cast out in wax. The base for the figures was a repurposed jam jar lid, with a small length of dowel attached to create a peg on which the figures locate.

I readied the body parts for moulding by attaching them to a base. I used thin pieces of acrylic tube to create air channels in the silicone mould.


I moulded the bodies and heads in a soft RTV silicone, using chunks of previously cataleysd silicone as filler. I slashed these moulds open in a zig-zag pattern so the mould would key back together nicely and removed the plasteline.


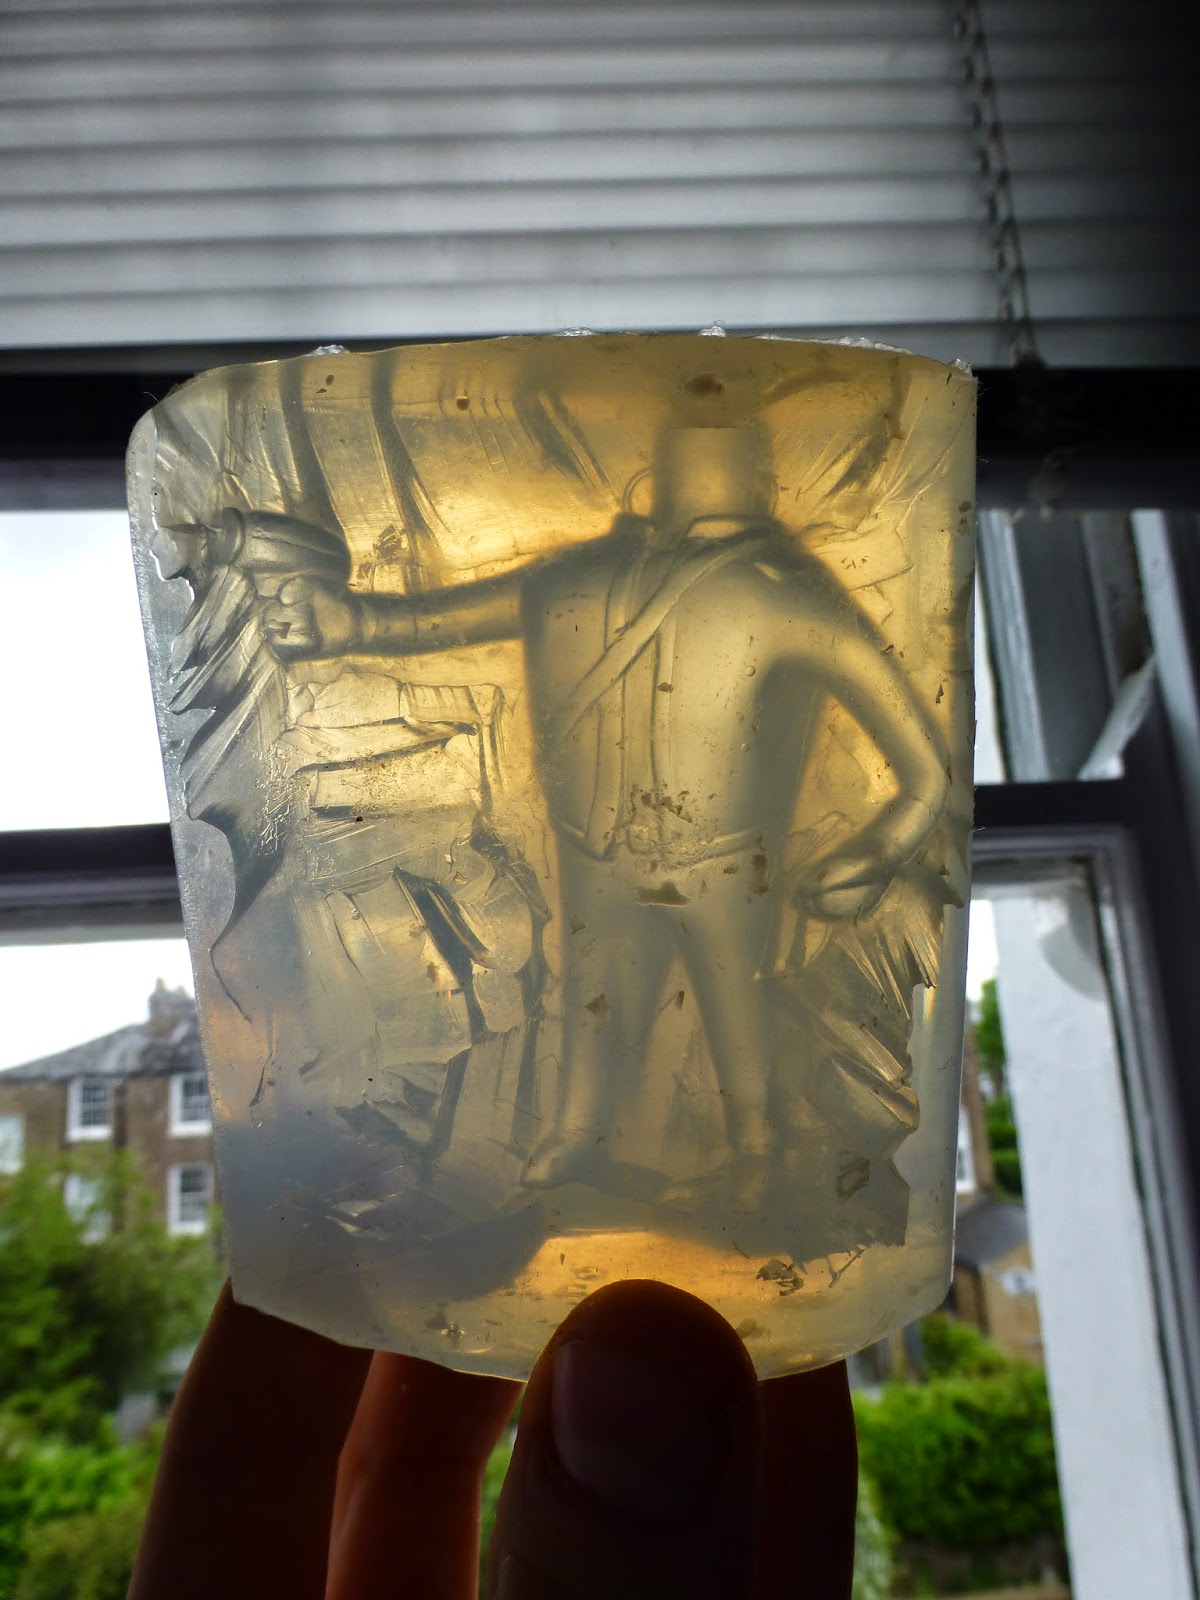
I used these moulds to cast out a mixture of various waxes and talcum powder. I followed the recipe of Scott Hensey, toymaker extraordinaire. The wax had to be the right temperature; too cool and it would set as it was going into the mould, too hot and it would separate. I tried getting the wax into the mould with a syringe, but this allowed the wax too long to cool down, so the casts came out with a strange layered effect as shown in the photo below.

Once I had some good wax casts I cleaned them up by scraping the surface of the wax, and in some spots added molten wax to build up an area, before working it back and smoothing it over. With time and patience I managed to get quite a nice finish on the wax casts.

I moulded the polished wax casts in a hard clear silicone in much the same method as the previous moulding, but this time used a degasser to ensure the silicone had no air bubbles. This was a great silicone to use, as it does not warp easily and I would probably be able to take a few dozen casts from these moulds before they would need to be replaced. The silicone being clear meant that while I was pouring the silicone I could easily see and then remove air bubbles. One downside is due to the viscosity of the silicone it took about an hour to degas. These moulds were slashed in exactly the same way as the previous moulds, just much more carefully. The empty moulds look really quite ghostly.


I tried casting in polyester resin but decided it took too long to set and the shrinkage was too noticeable. There was shrinkage with the wax casts already, which I didn't want to encourage. I also tried a few different polyurethane resins, and eventually settled on some slow setting polyurethane which would give me the time to pour the resin into the moulds and get air bubbles out from all the small passages in the mould. The clear silicone meant that I could see exactly where bubbles were collecting, and remove them. Below are some of the test casts.

Below is a demonstration of the shrinkage of different materials - on the right we have the original plasteline sculpts, in the middle the wax casts, and on the left the polyester casts. Those particular resin casts come out significantly smaller than the original sculpt, which you need to take into consideration when working with materials with shrinkage. The polyurethane resin I ended up using has very little shrinkage.

Once I had some casts I was happy with I did some final polishing up and did a final test fitting before starting work on the colouring. While casting I was aware that the thin barrel on Lewis's gun would be very vulnerable to damage, so I inserted a small piece of wire into the mould as I was casting, so the final barrel is metal rather than resin.


I used my airbrush to spray the casts, giving me a lovely smooth finish. I first sprayed the most significant areas of each individual piece - the skin colour. I then masked this up with tape, before spraying on the next most used colour.


The rest of the colours were built up with a brush, and small details were added, such as the inside of Simon's Jaffa and various bits of gold trim. I then gave the figures a coat of polyurethane varnish to keep the paintwork in good condition, and attached them to their bases which I had painted to look like grass.


Read more
I started off sculpting the heads and the bodies of the figurines in plasteline separately, as moulding and casting a whole model would be overly complicated.
I polished these up as best as I could and carved some details such as Lewis' sword and gun out of some small pieces of chemiwood. I actually spent too long polishing them up, as the plasteline I had was quite soft and didn't polish easily. I should have kept them quite rough, and finished them up once they were cast out in wax. The base for the figures was a repurposed jam jar lid, with a small length of dowel attached to create a peg on which the figures locate.
I readied the body parts for moulding by attaching them to a base. I used thin pieces of acrylic tube to create air channels in the silicone mould.
I moulded the bodies and heads in a soft RTV silicone, using chunks of previously cataleysd silicone as filler. I slashed these moulds open in a zig-zag pattern so the mould would key back together nicely and removed the plasteline.
I used these moulds to cast out a mixture of various waxes and talcum powder. I followed the recipe of Scott Hensey, toymaker extraordinaire. The wax had to be the right temperature; too cool and it would set as it was going into the mould, too hot and it would separate. I tried getting the wax into the mould with a syringe, but this allowed the wax too long to cool down, so the casts came out with a strange layered effect as shown in the photo below.
Once I had some good wax casts I cleaned them up by scraping the surface of the wax, and in some spots added molten wax to build up an area, before working it back and smoothing it over. With time and patience I managed to get quite a nice finish on the wax casts.
I moulded the polished wax casts in a hard clear silicone in much the same method as the previous moulding, but this time used a degasser to ensure the silicone had no air bubbles. This was a great silicone to use, as it does not warp easily and I would probably be able to take a few dozen casts from these moulds before they would need to be replaced. The silicone being clear meant that while I was pouring the silicone I could easily see and then remove air bubbles. One downside is due to the viscosity of the silicone it took about an hour to degas. These moulds were slashed in exactly the same way as the previous moulds, just much more carefully. The empty moulds look really quite ghostly.
I tried casting in polyester resin but decided it took too long to set and the shrinkage was too noticeable. There was shrinkage with the wax casts already, which I didn't want to encourage. I also tried a few different polyurethane resins, and eventually settled on some slow setting polyurethane which would give me the time to pour the resin into the moulds and get air bubbles out from all the small passages in the mould. The clear silicone meant that I could see exactly where bubbles were collecting, and remove them. Below are some of the test casts.
Below is a demonstration of the shrinkage of different materials - on the right we have the original plasteline sculpts, in the middle the wax casts, and on the left the polyester casts. Those particular resin casts come out significantly smaller than the original sculpt, which you need to take into consideration when working with materials with shrinkage. The polyurethane resin I ended up using has very little shrinkage.
Once I had some casts I was happy with I did some final polishing up and did a final test fitting before starting work on the colouring. While casting I was aware that the thin barrel on Lewis's gun would be very vulnerable to damage, so I inserted a small piece of wire into the mould as I was casting, so the final barrel is metal rather than resin.
I used my airbrush to spray the casts, giving me a lovely smooth finish. I first sprayed the most significant areas of each individual piece - the skin colour. I then masked this up with tape, before spraying on the next most used colour.
The rest of the colours were built up with a brush, and small details were added, such as the inside of Simon's Jaffa and various bits of gold trim. I then gave the figures a coat of polyurethane varnish to keep the paintwork in good condition, and attached them to their bases which I had painted to look like grass.


